Showing posts with label Distress Inks. Show all posts

Sunday, 12 October 2008

Christmas Match Box

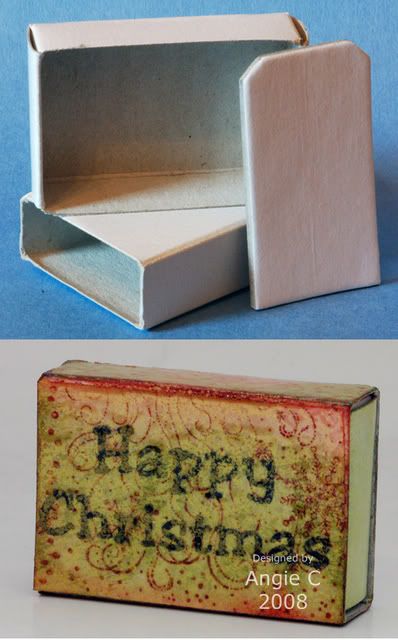
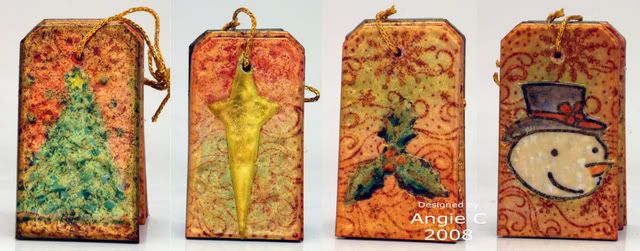
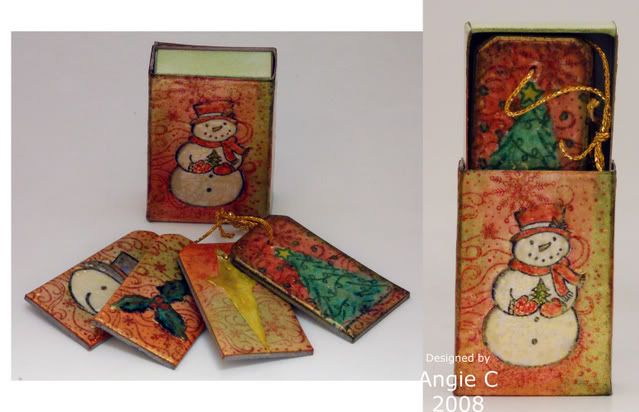
This is a match box I have altered. I used a blank match box, 4 tiny chipboard tags, distress inks, Cosmic Shimmer Ultra Thick Crystals and various small Christmas stamps. The match box measures 2" x 1 1/2"


Instructions for how to make this will appear on One Stop Card Crafts project page shortly.
Please click on pics for a larger view

Tuesday, 7 October 2008

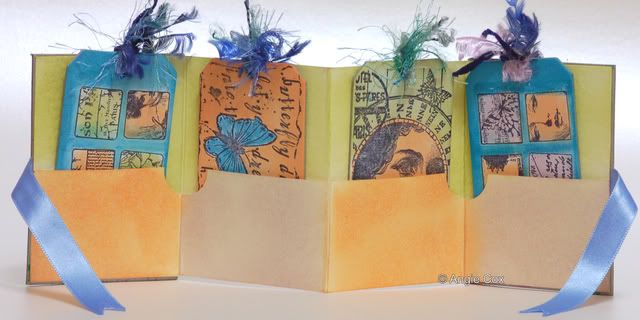
Tag Book

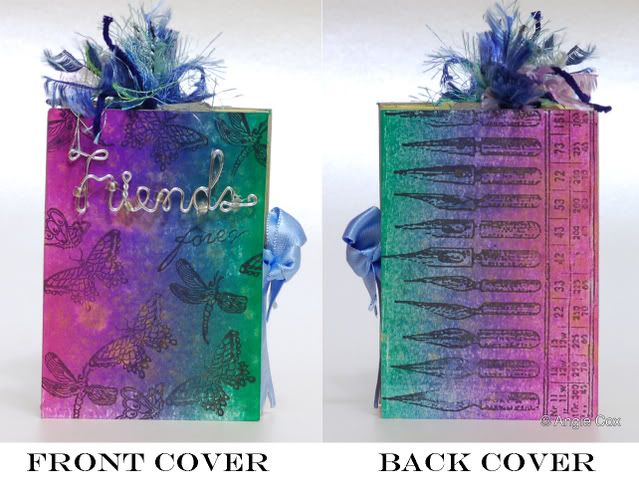
This book I made for a swap I'm involved in "Me to You" and I sent this to my dear friend Claire.

The front and back covers were made using chipboard which I bought from The Artistic Stamper, they are 4" x 6". I used a brayer and a Big and Juicy birthday ink pad to colour the chipboard and then gave them a spray of gold Glimmer Mist. On the front I added a Papermania wire word Friends. I then stamped various stamps using black ink. The back cover was made in the same way and I used one of my new Tim Holtz stamps nibs.


The pages/pockets were made from a piece of A4 card, which I coloured using distress inks in various colours. Before I attached the covers to the concertina pages/pockets I added some blue ribbon so the book could be kept closed.


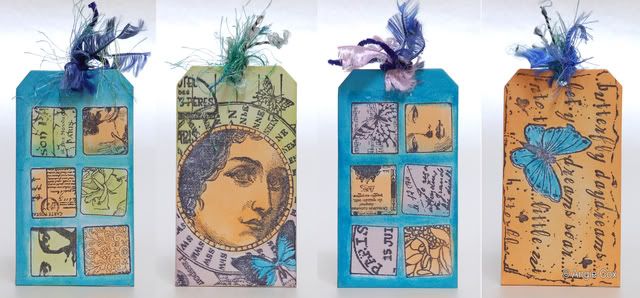
The tags are again chipboard from The Artistic Stamper. I used various stamps again, stamped in black ink. I then used distress inks and an ink blending tool to colour the tags. I then added some fibres to the tags and they were finished.

click on images to view larger

I have also entered this into Caardvarks Challenge, which this week is to use scoring
Wednesday, 1 October 2008

My Final Houses

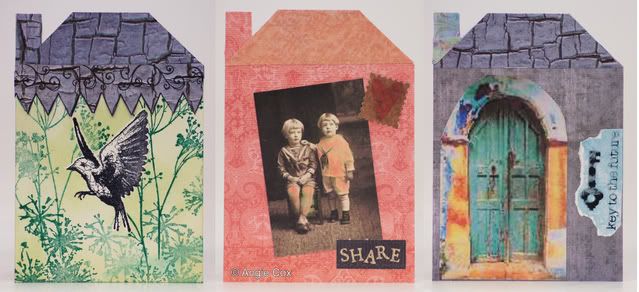
At last I've finished all ten of my houses for a swap I'm involved in. These are the final three, so they are all ready to be put in Royal Mail's hands tomorrow.

For the left house I used some Tim Holtz/Stampers Annonymous stamps, the bird and the flowers. The background is inked using distress ink and the roof and chimney is some scrapbook paper which I cut out to fit the house. I stamped a Paper Artsy stamp onto a piece of the scrapbook paper and cut out the image to make the zig zagged edge.

The middle house is covered using some DCWV papers and the image of the children is one I downloaded from the web, and I added a hint of pink to the image with distress inks. I added a HOTP ribbon word "share" and a little faux postage stamp with a heart.

The right hand house is again covered with DCWV papers and another piece of the scrapbook paper for the roof and chimney. The doorway image is printed from the pc and the little key and saying is a rub on.


Thursday, 25 September 2008

Altered Canvas

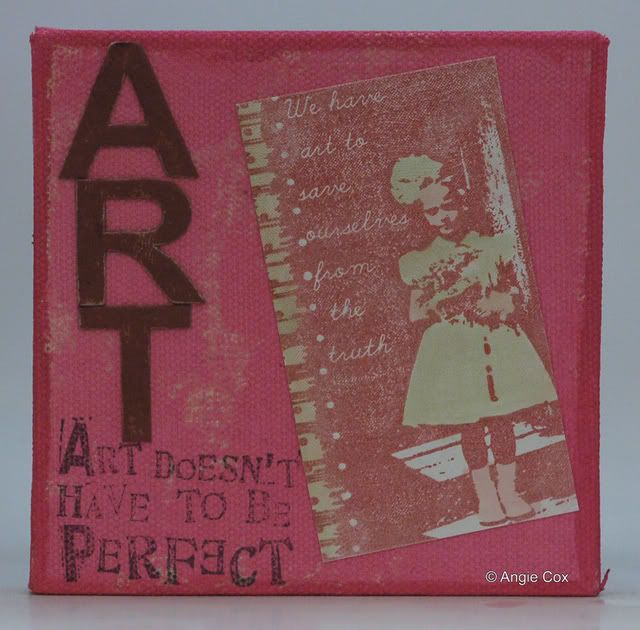
This small canvas I altered for a forum friend as part of a "Me to you" swap I'm involved in. I used acrylic paints, chipboard letters, stamps and distress inks. It was hard to get a photo showing the true colour, it is much lighter in "real life".


please click for larger view

Wednesday, 25 June 2008

SS Week 22 - Friends

This weeks Sunday Stampers challenge over on Hels blog is "Friends" so I made an ATC :-)


I cut a piece of cardstock to measure 2 1/2" x 3 1/2" and then I stamped the Hero Arts Friends stamp using black archival ink. When the ink was dry I set about it with some distress inks and using cut n dry foam I coloured the stamped image.

To add a little depth to the ATC I used some Crystal Lacquers - unfortunately these don't show up too well in the picture.

Friday, 13 June 2008

Birthday Card


This card I made for one of my friends birthdays. The blue backing paper is K & Co, which I mounted onto cream card. The stamped image is a Tuscan Rose stamp, which I stamped a couple twice onto white card. I cut out the full image and then cut out the top butterfly and the framed square so I could 3d them. I coloured the stamped image using various distress inks and the butterfly and frame sqaure I coloured with distress inks and then used a versamark ink pad and clear UTEE to give them a nice glossy finish. I attached the butterfly and square onto the card using foam pads. I then stamped Happy Birthday onto the card, but I don't think it really goes too well with the overall card.

Thursday, 12 June 2008

A Couple of Altered Things

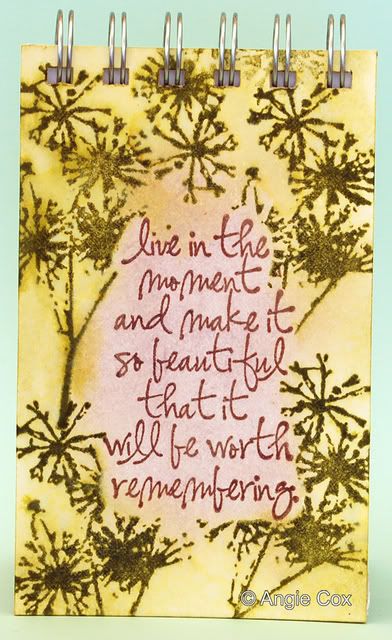
These two items I made for Ann as part of a Me to You swap which I'm involved in. The first thing is a small Bind It All Notebook. I used two pieces of mountboard to make the covers and I used some lined paper for the inner pages. I stamped the sentiment first and then masked it and then stamped the flowers/trees. I coloured the cover using distress inks.

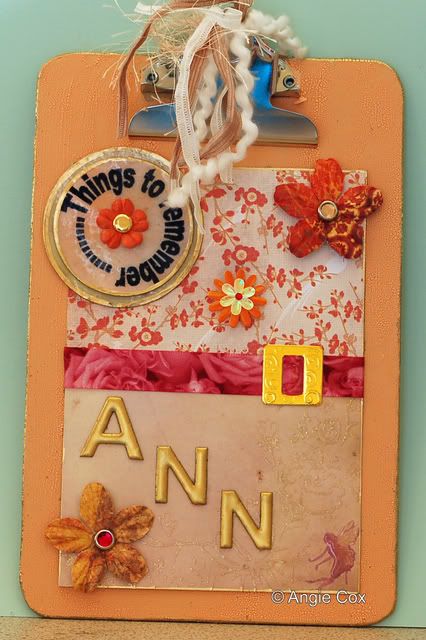
The next thing I made is an altered clipboard - this is the first time I've ever done one of these and I think it turned out okay for a first attempt. I painted the clipboard using Marigold Crackle Paint and then left it to dry. I used two pieces of DCWV papers, one from the Once Upon a Time stack and the other from the Oriental stack. I stuck the two papers onto a thin piece of card and then I added a ribbon with a faux buckle to cover where the papers joined. I then took three chipboard letters and tripple embossed them using gold UTEE. I used my Craft Robo to cut out two circles one with Things to remember printed on to it. I then coloured the circles using shimmer chalks and then I triple embossed them using clear UTEE. I added a small orange prima flower using a brad to attach it to the circles and to the main piece. I then used two of the new collage Prima flowers and again attached these using brads with gem centres. I added a small 3d orange and yellow flower (crafty bitz) As a finishing touch, I used a little glossy accents over the fairy in the right corner and then added ribbons and fibres to the top of the clipboard.

This weeks challenge over on Funky Fairys Blog is "dominated by threes" so as I used 3 prima flowers, 3 brads and 3 letters I thought the clipboard would be ideal to enter.

Sunday, 8 June 2008

Vintage Birthday Card


This is another card I have made today. The colours on the image aren't really that bright.


I used another of my new Tuscan Rose stamps for this card and stamped it using sepia versafine ink onto white cardstock. I used distress inks to colour the stamped image and highlighted the stop watch using glossy accents. I mounted the image onto gold mirror card and then onto white card. I edged the white card with gold ink. The backing paper I used is from one of my DCWV stacks and I put this onto my white card blank, leaving just a little of the white around the edge. For the sentiment I used a gold peel-off (well I've got tons of them and need to use them up!). I put the peel-off onto a piece of the DCWV paper and then mounted it onto white card and then gold mirror card. Just to finish the card off I went around the main card with my gold ink pad.

Monday, 7 April 2008

Tag Your It


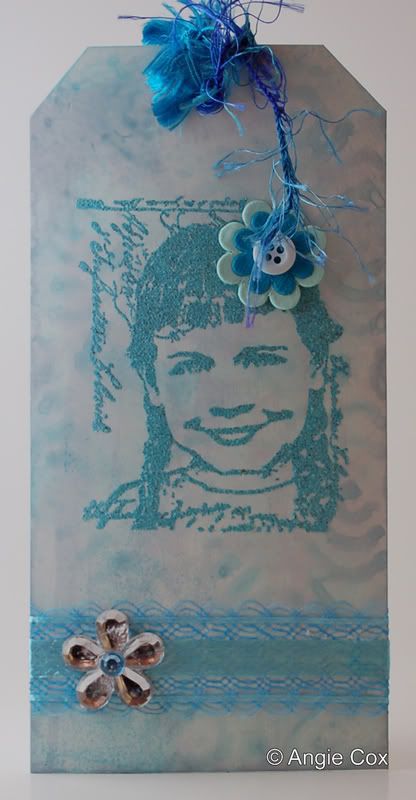
Whilst blog hopping this morning I came across a new challenge blog Weekend Taggers. The first challenge is "shades of blue".


I cut my card to 6" x 3" and cut the corners off the top to make a tag shape. I used my distress ink pads (broken china and weathered wood) to create the background. I then used one of my Paperbag Studio stamps and stamped it using a versamark ink pad and then sprinkled the image with broken china distress embossing powder and heat set it. I then added a blue button flower in the girls hair and put some blue ribbon across the tag close to the bottom and added a shiny gem flower with a blue centre. Finally I added a blue eyelet and some blue fibres.
Click for larger view


Sunday, 6 April 2008

Long Tall Sally


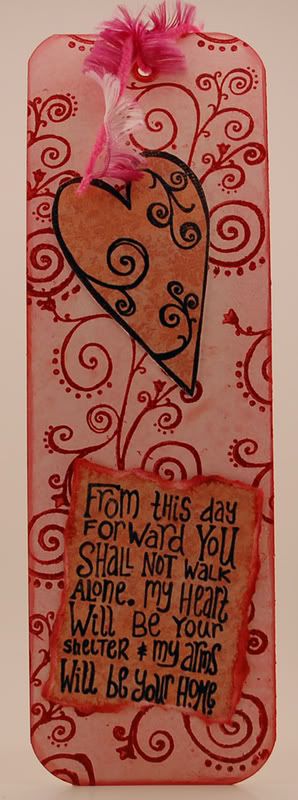
This is a bookmark I made for this weeks challenge on Funky Fairies blog - which was "I want you to make something tall and skinny"


I used worn lipstick and tattered rose distress inks to make the background of the bookmark. I then used fired brick distress ink and stamped the swirl stamp (Paper Artsy) over the background and added fired brick distress embossing powder and heat set it. I then stamped the heart swirl and sentiment stamp onto some pink paper using a black ink pad and added clear embossing powder and heat set it. I tore the paper around the sentiment and I cut out the heart and mounted them both onto the bookmark. Finally I edged it with fired brick ink and added an eyelet and some pink fibres.

Wednesday, 19 March 2008

Birthday Card


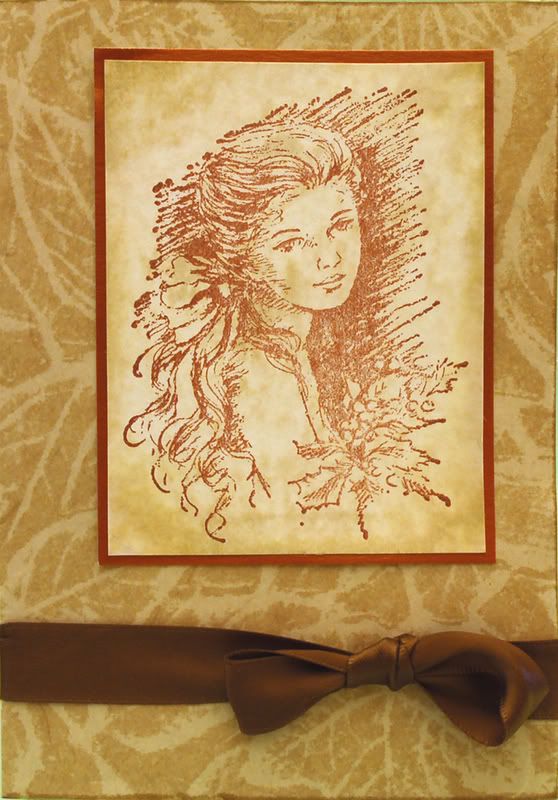
This card I made for a forum friend's birthday. The stamped image is one I stamped at a craft club a while ago.

I used some distress ink over the stamped image to give it an aged look and then I layered it onto some copper mirror card. I added a brown ribbon and it was finished.

Sunday, 16 March 2008

I'm a Lady


This card I made for Hels Sunday Stampers challenge. This weeks challenge was to make something using a stamp that has a woman, laydee, female image.


I used an A5 white card and stamped all over it using an Anna Griffin background stamp in worn lipstick distress ink and I also edged around the card. The main stamped image is one I stamped a while ago at craft class. I coloured it using Marvey Le Plume pens and a waterbrush. Then I matted it onto gold mirror card and then red card. I simply added a few little red flowers, which I attached using gold brads and them a piece of ribbon and a bow to finish it off.


Click on picture to view larger

Thursday, 6 March 2008

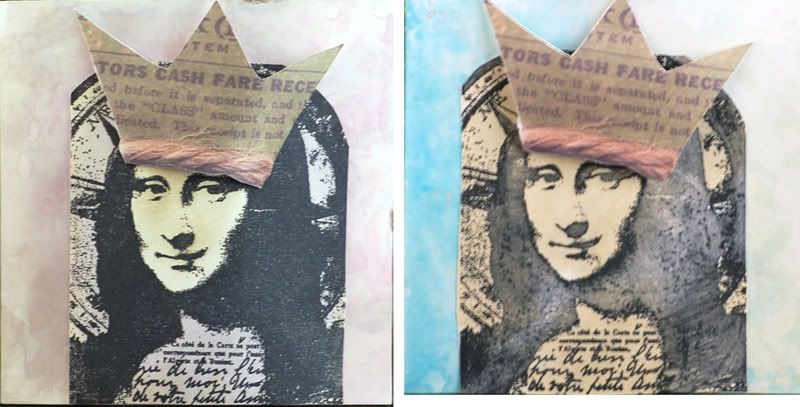
Mona Lisa Fat Book Pages


These are two fat book pages which I have made. I used distressing inks for the backgrounds. The stamped images of Mona Lisa were sent to me by a friend and I coloured those using distressing inks and added them to the background. I then cut out the crowns from the Tim Holtz Elements CD and used silicone glue to attach them to the page.
click on pic to view larger

Thursday, 28 February 2008

I made another tag tonight - I love making tags. I used distress inks for the background and some Cats Life Press and Tim Holtz stamps.

Monday, 25 February 2008

Funky Fairys Challenge 9

It hasn't been a bad day here today, dull but dry. I managed to get a little crafting done.
I made this tag for the challenge on Funky Fairys "Create a tag, something tag-shaped or including one or more tags, and your tags can be any shape or size"
I used Tim Holtz Distress ink for the background and then stamped the Tim Holtz sentiment/saying randomly over the tag. I used some DCVW paper and stamped the sentiment again and also stamped the Tim Holtz bird and then I tore the papers to get a nice rough edge on them and then inked the edges using old paper distress ink. I then just added some ribbon and fibres.


Click on picture to view larger

Sunday, 24 February 2008

Time Flies

I bought some cheap 4" x 6" frames to alter and I really like the effect I got. This is the frame before and after.


I cut out the letters "Time Flies" on my Craft Robo and stuck them onto the bottom of the frame using a little glue. I covered the frame with Aluminium Foil Tape and then used Ginger, Butterscotch, Caramel and Latte alcohol inks to colour the frame. I used an adirondack ink pad and tapped it over where the letters were and then wiped off the alcohol ink so the words stood out against the coloured frame. I took two pieces of DCVW Far East paper and tore the edge off the blue piece and then I inked the edge using Old Paper distress inks and I also distressed parts of the paper to make it look older. I printed an old photograph onto photo paper and then distressed it using the Old Paper distress ink and I went around the edges with a distressing tool and then inked them with the distress ink. I used a watch stamp, which I got from The Artistic Stamper, and using a versamark ink pad I stamped it onto some white pearlescent card and then covered it with Gold Tinsel embossing powder and heated it. I cut out the stamped watch image and put some German Scrap gold wings behind it. The photograph I put flat on the background and I raised the watch with wings using foam pads.

The weekly challenge on Sunday Stampers this week is "Time" so I thought this would be ideal.

The weekly challenge on Funky Fairys this week is to use a photograph on your card, scrapbook page or brag book etc etc - so this also qualifies for that challenge too.

Wednesday, 20 February 2008

Another Tag

Good morning, it's quite a nice morning here - cold but no frost. Hope everyone has a good day.

I made this tag for a friend, hopefully Royal Mail have delivered it by now. I used distress inks for the background of the tag. I put some of the ink onto a craft sheet and spritzed it with water and then laid my tag down on it - I love the effect from this technique and you always get something different each time. I used Cats Life Press stamps and stamped them using Broken China distress ink and sprinkled them with clear embossing powder and heated them. I then stamped the "Butterfly Fairy" onto a piece of blue patterned paper and then cut her out. I cut off her wings and replaced them with a pair of gold German Scrap wings. On the back of the tag I stamped using rusty brown and black stazon and also edged the tag with the rusty brown stazon.


Click on the image to view it larger

Saturday, 16 February 2008

Some tags I have made

These are 3 tags which I have made for Hels Angels Tag Swap. The theme for this month is Paper Artsy - so we had to use Paper Artsy stamps. These are the first tags I've ever made! I hope that they are okay for the swap.

Initially I cut some cream cardstock into to 6" x 3" rectangles then cut off the corners to make the tag shape.
To get the effect for the background I rubbed distress inks onto a craft mat and spritzed them with water before dropping my tag into the inks.
I took some DCWV paper and stamped in black ink, though on one I also stamped in white acrylic paint, before using some glossy accents to highlight parts of the stamped images.
I attached a large butterfly which I had cut on my Robo and inked using Alcohol inks.
Using some gold thread I attached a small butterfly charm.
As a finishing touch I added some fibres, and outlined the tags with a gold krylon pen.

I hope you like them - any comments, good or bad, most welcome
Click on picture to view larger.


Friday, 15 February 2008

My Paper World Sketch #4

This card I made for the Challenge on My Paper World. I used cream cardstock, some blue papers and yellow card for matting and layering. I used a Crafty Individuals stamp and stamped it on glossy card, in versamark ink and added clear embossing powder. I then used some cut n dry foam and some distress ink to colour the image. I then simply added a couple of layered flowers and attached them with a brad.


Tuesday, 29 January 2008

Pinkle's Challenge & Papertake Weekly Challenge

I've not done any crafting for a few days as I've been busy with one thing and another.

Anyway, here are two things I've made for The Sunday Stampers Challenge set by Pinkle http://pinkleart.blogspot.com/ The challenge was to use inky stampy techniques to make a card, ATC or a tag and this weeks theme was love.
Also the theme on Papertake Weekly Challenge was to make somethihng with a heart on it, so these were perfect.

The first thing I made is a card - I used red cardstock and the actual card design/fold was taken from January's Craft Stamper Magazine. I used a versamark ink pad, and stamped the free stamp which came with the magazine, randomly on the left front of the card and then embossed it using gold embossing powder. I put gold mirror card behind the front fold (hope that makes sense). Then I stamped an Anna Griffin heart stamp on a piece of red card again using the versamark ink pad and again embossed it with gold embossing powder. I then matted and layered it onto gold mirror card. The word "Love" I then stamped and embossed and matted onto red and gold card.


Next I made an ATC - I used some alcohol inks to make the background and then I stamped the heart in black ink and coloured it using a distress ink pad. I cut it out and edged it with a Krylon gold leafing pen. Again I used the free stamp and stamped "Love" on the bottom of the ATC and I added a lilac heart gem over the letter "o". Finally I used foam pads to mount the heart onto the ATC and edged it with the Krylon gold leafing pen.